Okay, here we go… my first blog post and I want to write about something I have found a new passion in. Restoring furniture. This passion sparked at the end of my last year in college with one of my final design projects. We were assigned to design and build a furniture piece for a separate residential project. At first, I was very nervous for what this assignment entailed. After several preliminary sketches of different ideas, I ended up with the final design. You can view my first piece under the furniture tab. A few short weeks later, I was buying an old hutch off of Facebook Marketplace to restore to new.
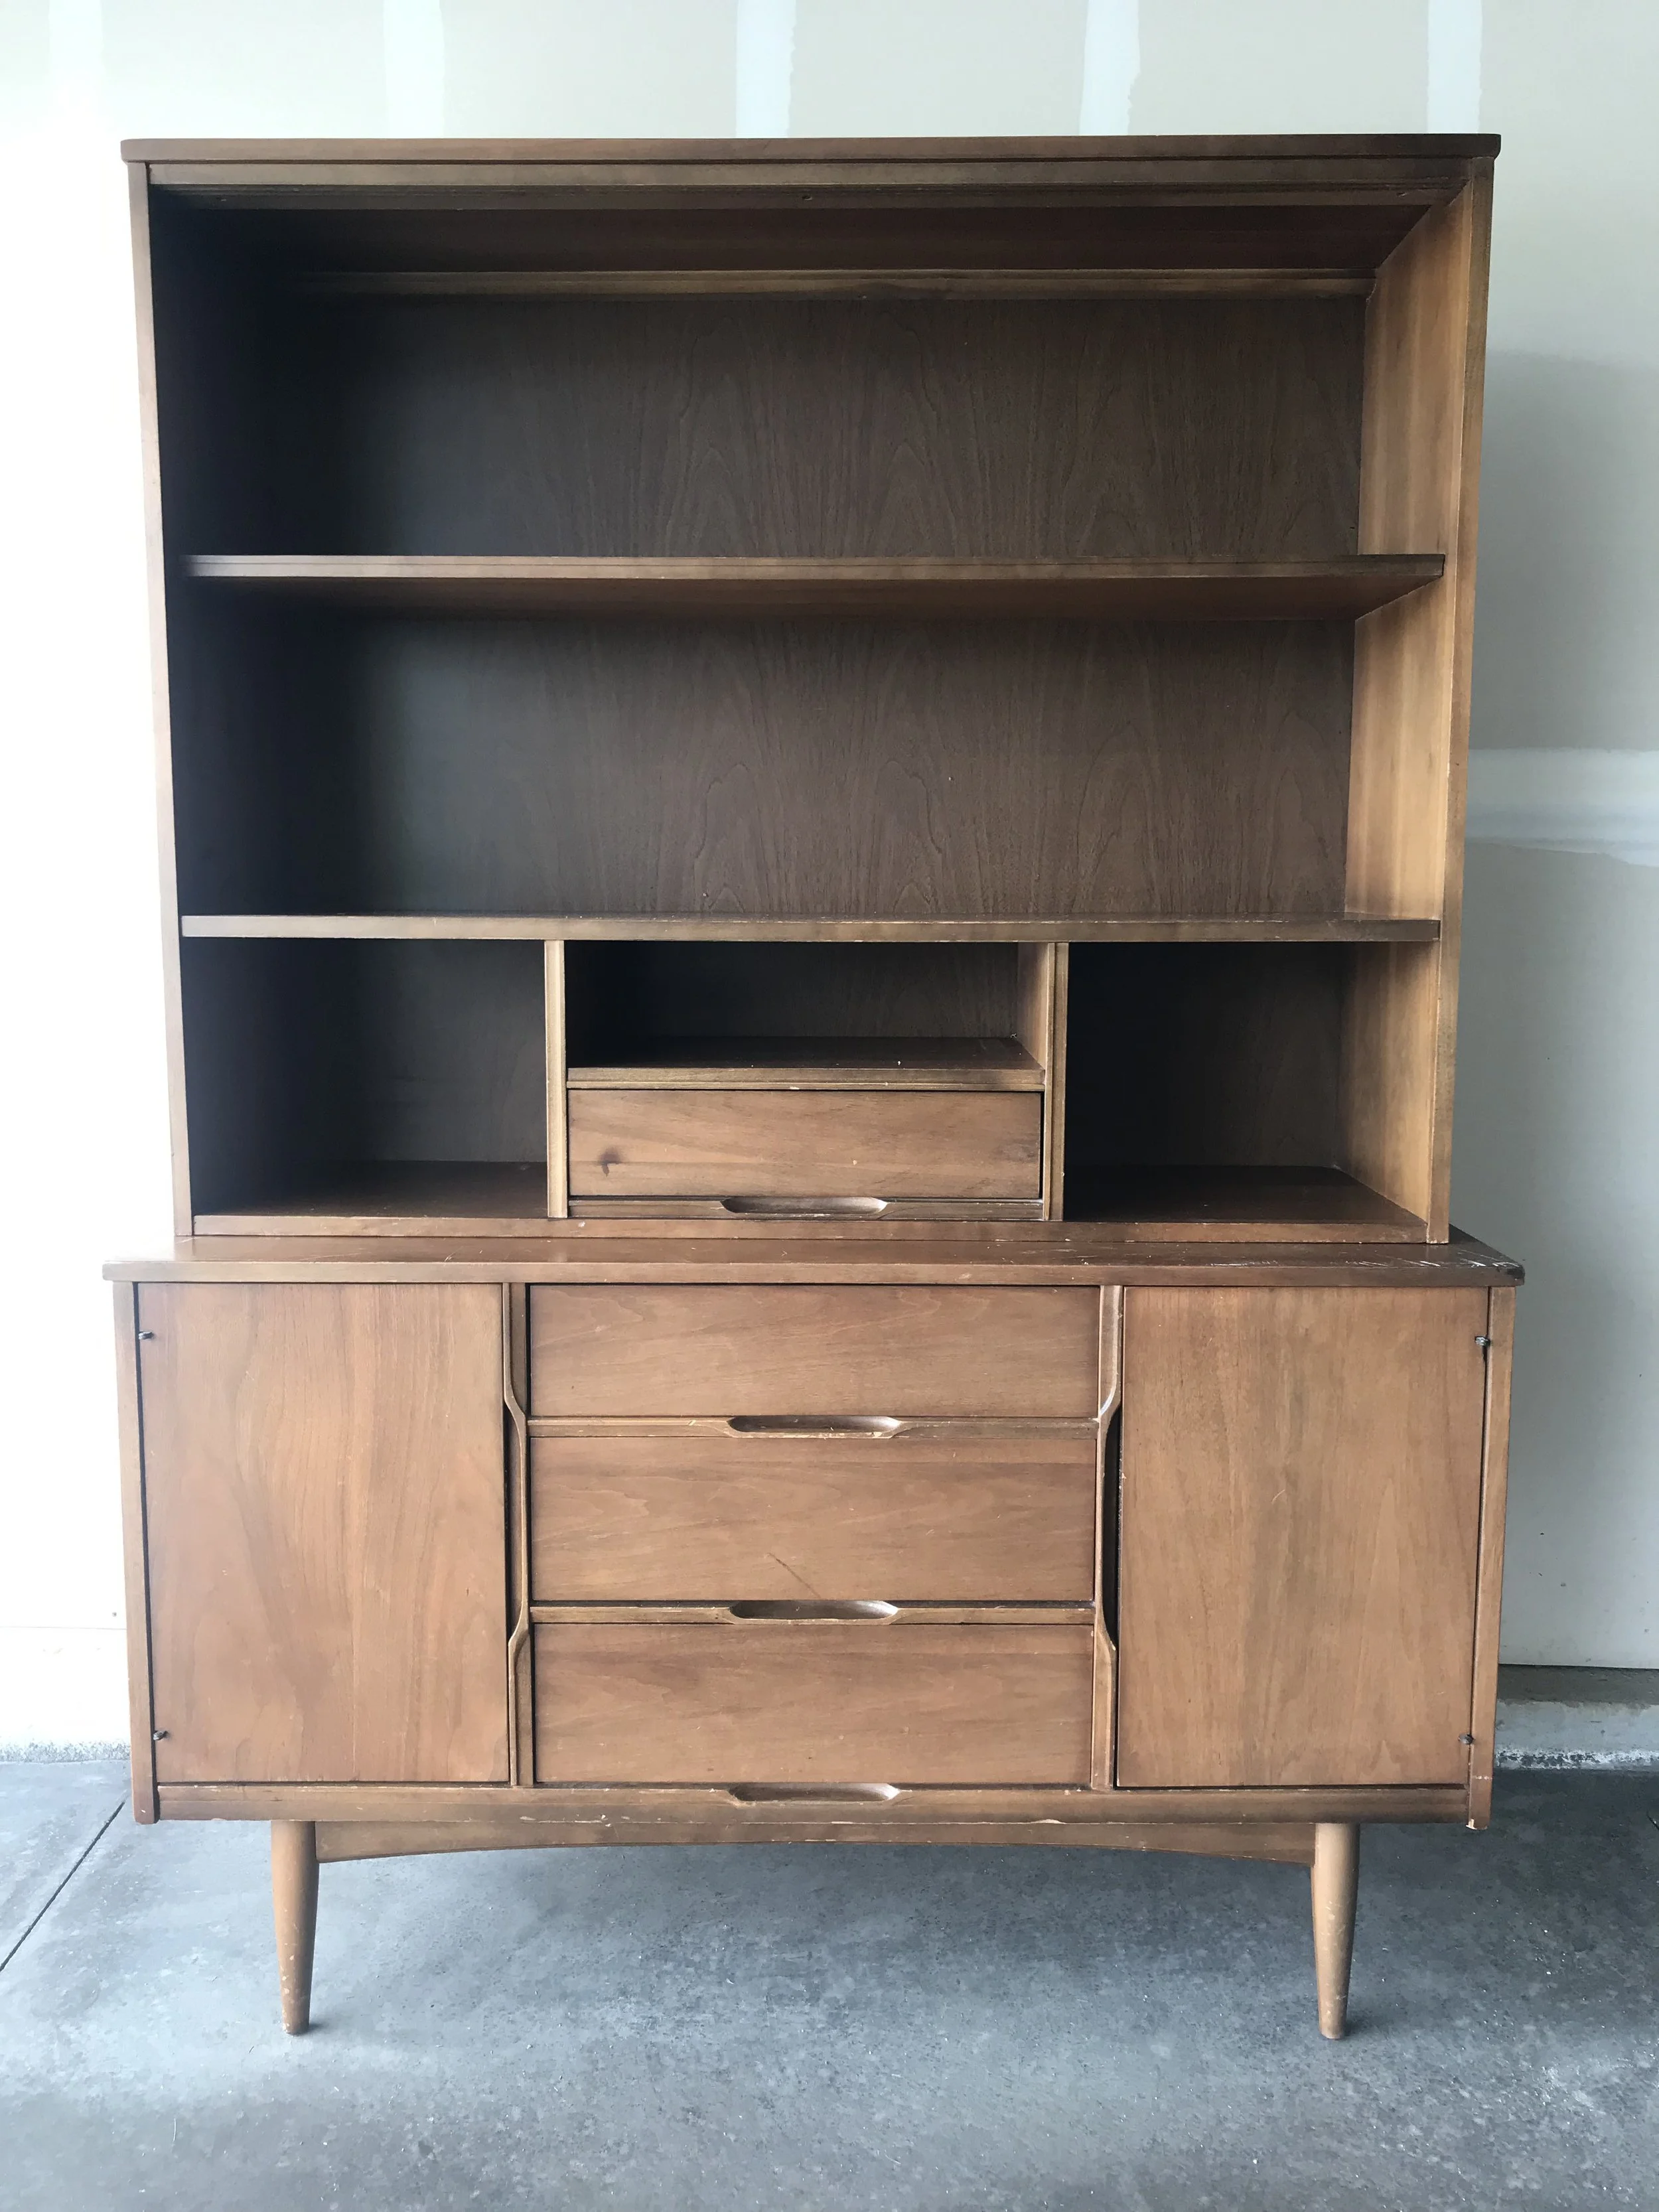
Condition of the hutch upon purchasing. Many scratches and scuffs from the many years it has been used and loved.
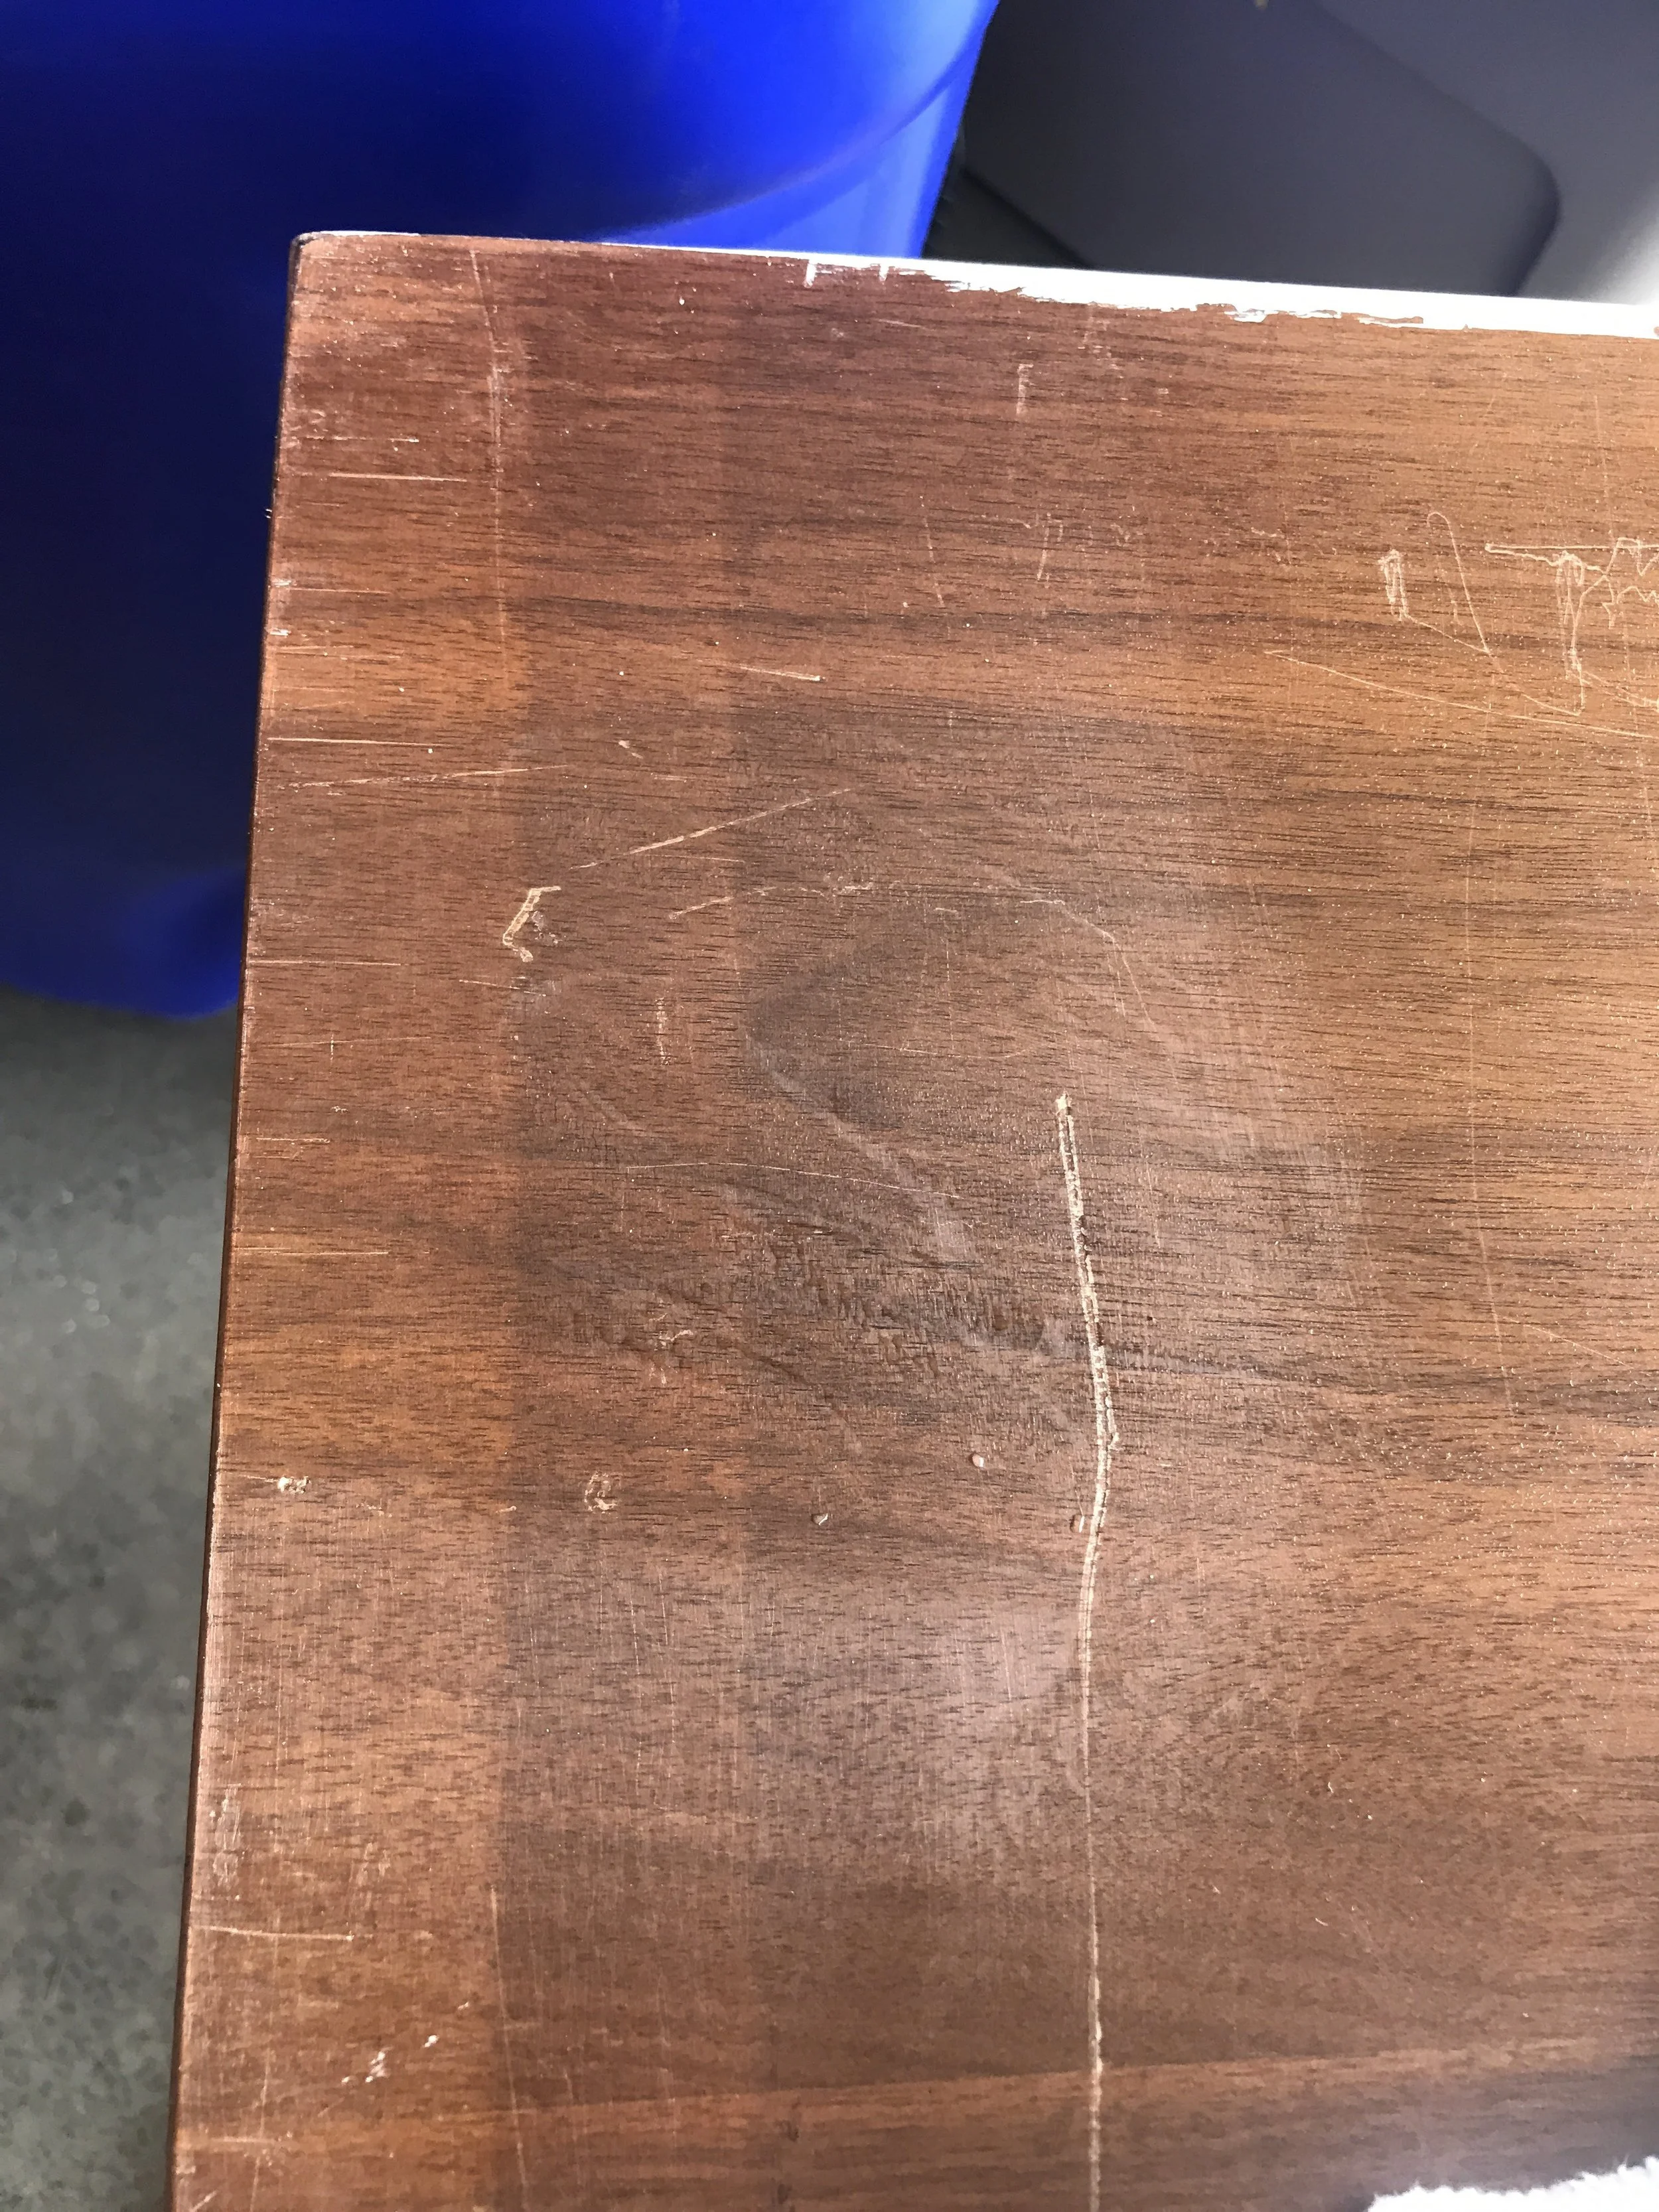
Deep scratches and paint marks found on many sides of both pieces.
One night during my regular scrolls through marketplace, this 1950s hutch caught my eye. I loved the walnut wood grain, the mid century modern elements from the leg shape to the details around the drawers and doors. After just a few moments, I could visualize how it would look after some simple sanding, staining, and a new design element to really make it pop.
After two trips to transfer it to my moms garage, I was ready to get working on it! I decided I wanted to start with sanding the bottom piece because it looked “easiest” and I was excited to see the scratches erased from the top. I removed the legs, took off the doors, pulled out the drawers, and wiped down every corner and was ready to see the transformation.
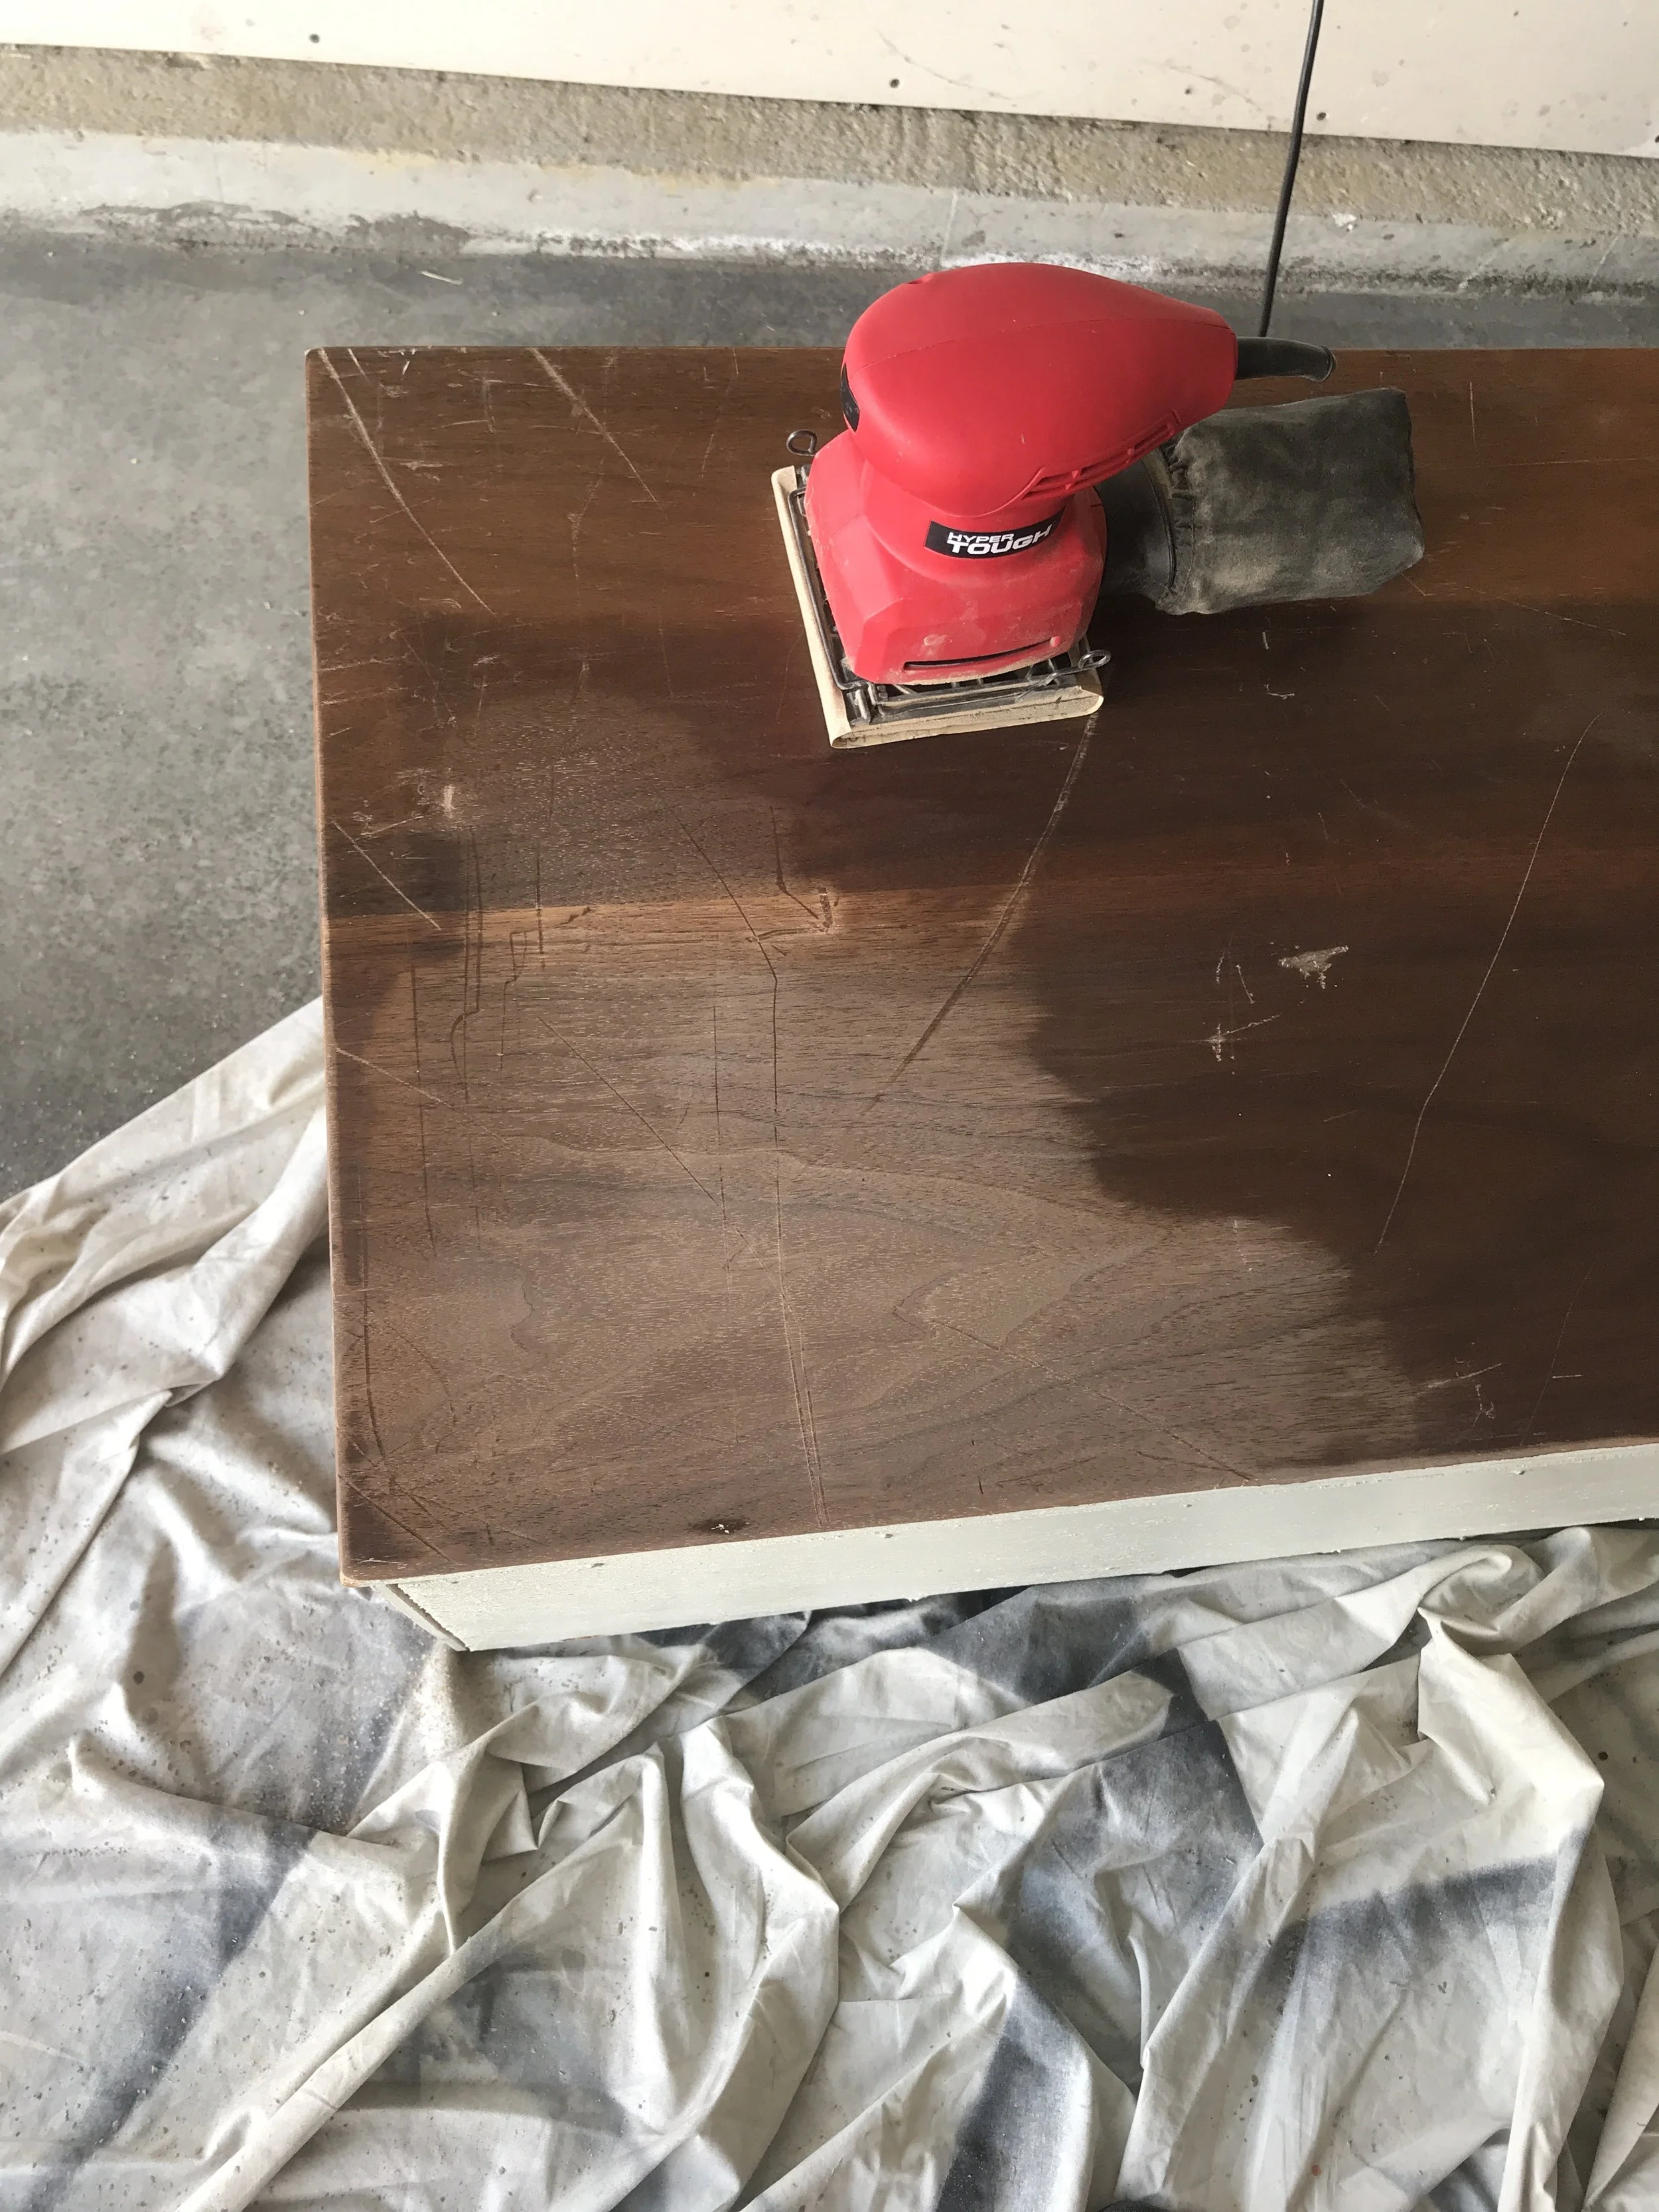
Sanding process, removing the original varnish.
Remember when I said that sanding was going to be a simple task?! What an ignorant initial thought. Ya no, sanding is not simple in the slightest. Without an electric hand sander, I probably would have given up right then and there. After the first few hours of sanding, I knew this was going to take a long time and a lot of elbow grease. Once realizing this, I decided that everyday I need to have a goal of what I want to complete to get closer to the end product. For example… today I’m going complete the top, tomorrow I’m going to sand both the side panels, the doors, and shelves. This type of thinking and planning helps me complete everyday tasks, ever since I was a little doing school work. It took me about a week, a few hours a day to complete sanding the bottom piece.
Next, it was time to sand the top piece, the piece I was dreading. I started with the sides that were easily accessible from any angle. Once I got to the shelves and tight corners, I ended up naming the top piece the jealous ex-girlfriend. The reasoning being, it was not willing to cooperate with me especially after I had finished sanding her ex-boyfriend. My travels to Italy and a move to a new apartment delayed the working process. Once I got all settled into my new place, I still found it difficult to get back into the groove of sanding the final sections.
In the middle of August, I knew I had to just get up and finish the dang thing. I kicked it into high gear, and finished sanding the entire thing. In some areas, I had to hand sand especially in corners. Once, the feeling in my finger tips came back, I ran to Menards to pick up a polyurethane clear matte finish to apply on the entire hutch. This was one area of the process that I did not know much about, but I went to my mom and grandma for their advise and knowledge on staining products. I knew I wanted to keep the natural look of the wood and did not want a darker finish. Unfortunately, naturally the wood was going to get darker applying any type of finish. I did research on what type of stains/finishes that would give me the look I was wanting, and found that polyurethane was going to be my best bet.
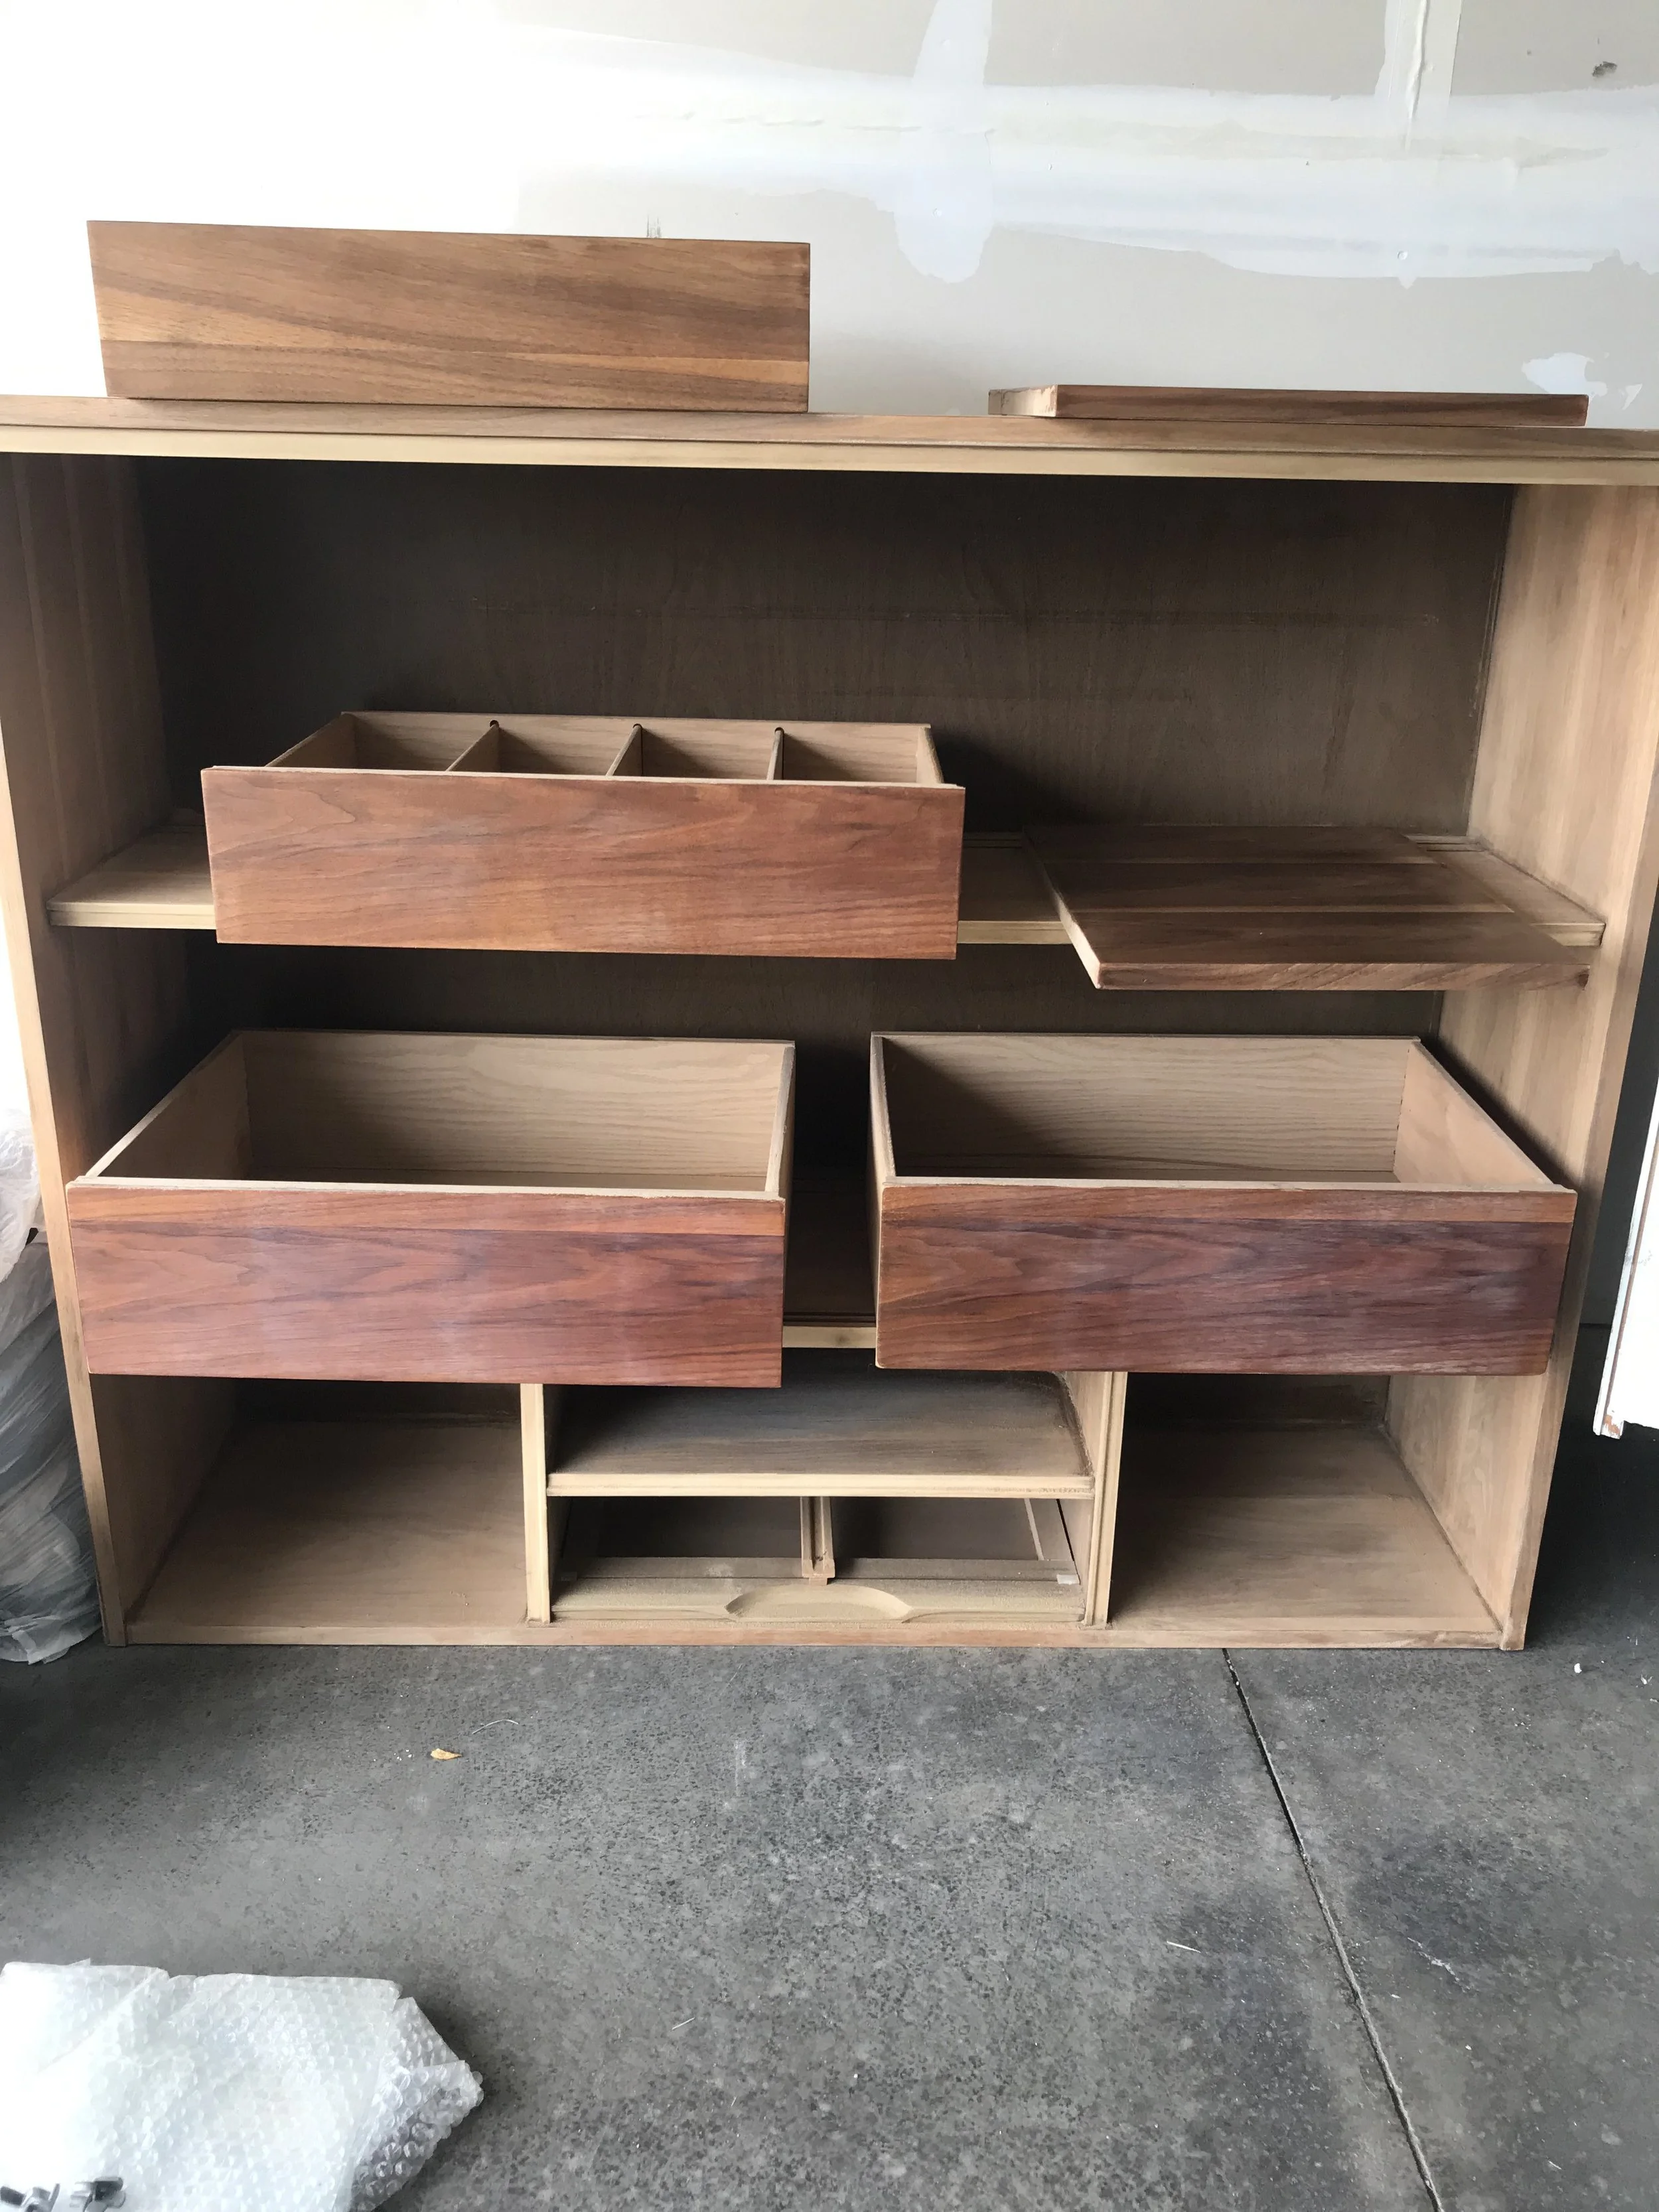
The process of applying the polyurethane clear matte finish to the drawer fronts. Top left drawer was done first. Bottom right was the last one to get applied.
This part of the restoring process was the easiest and the quickest. It took about three days to apply the finish to both pieces.
Bottom pieced wi the polyurethane finish, minus the legs.
Top piece with polyurethane finish, minus middle shelf.
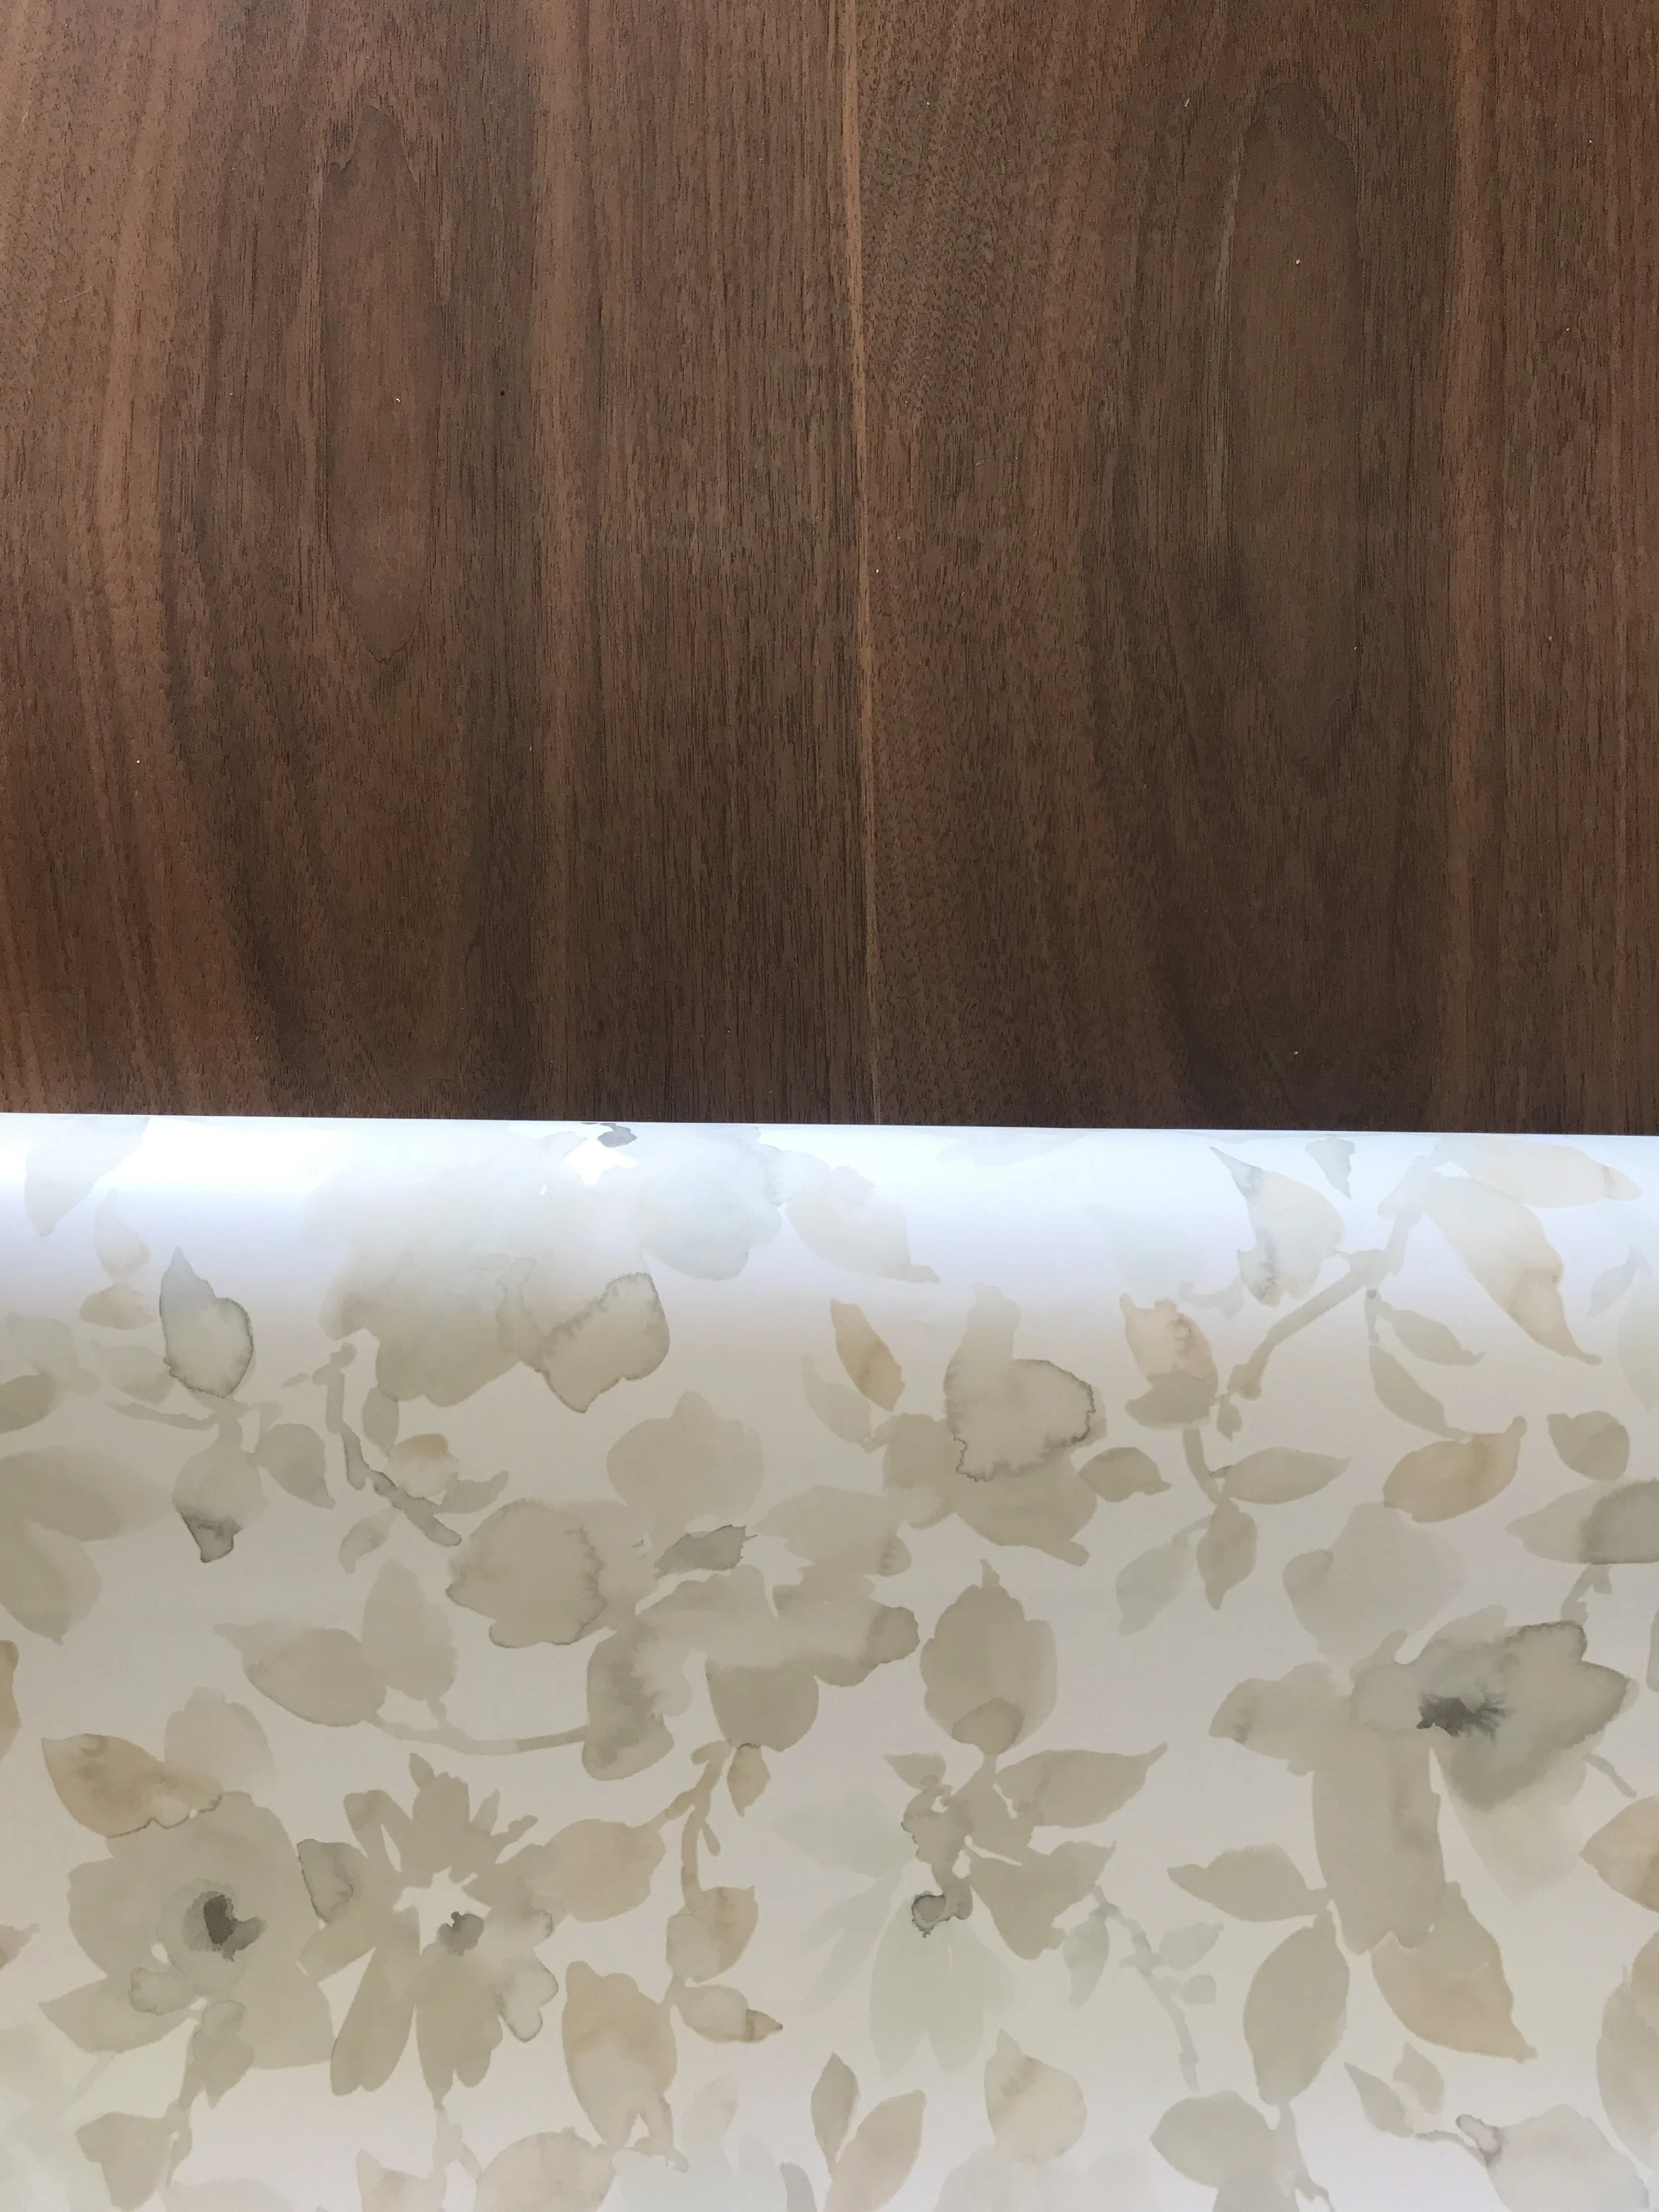
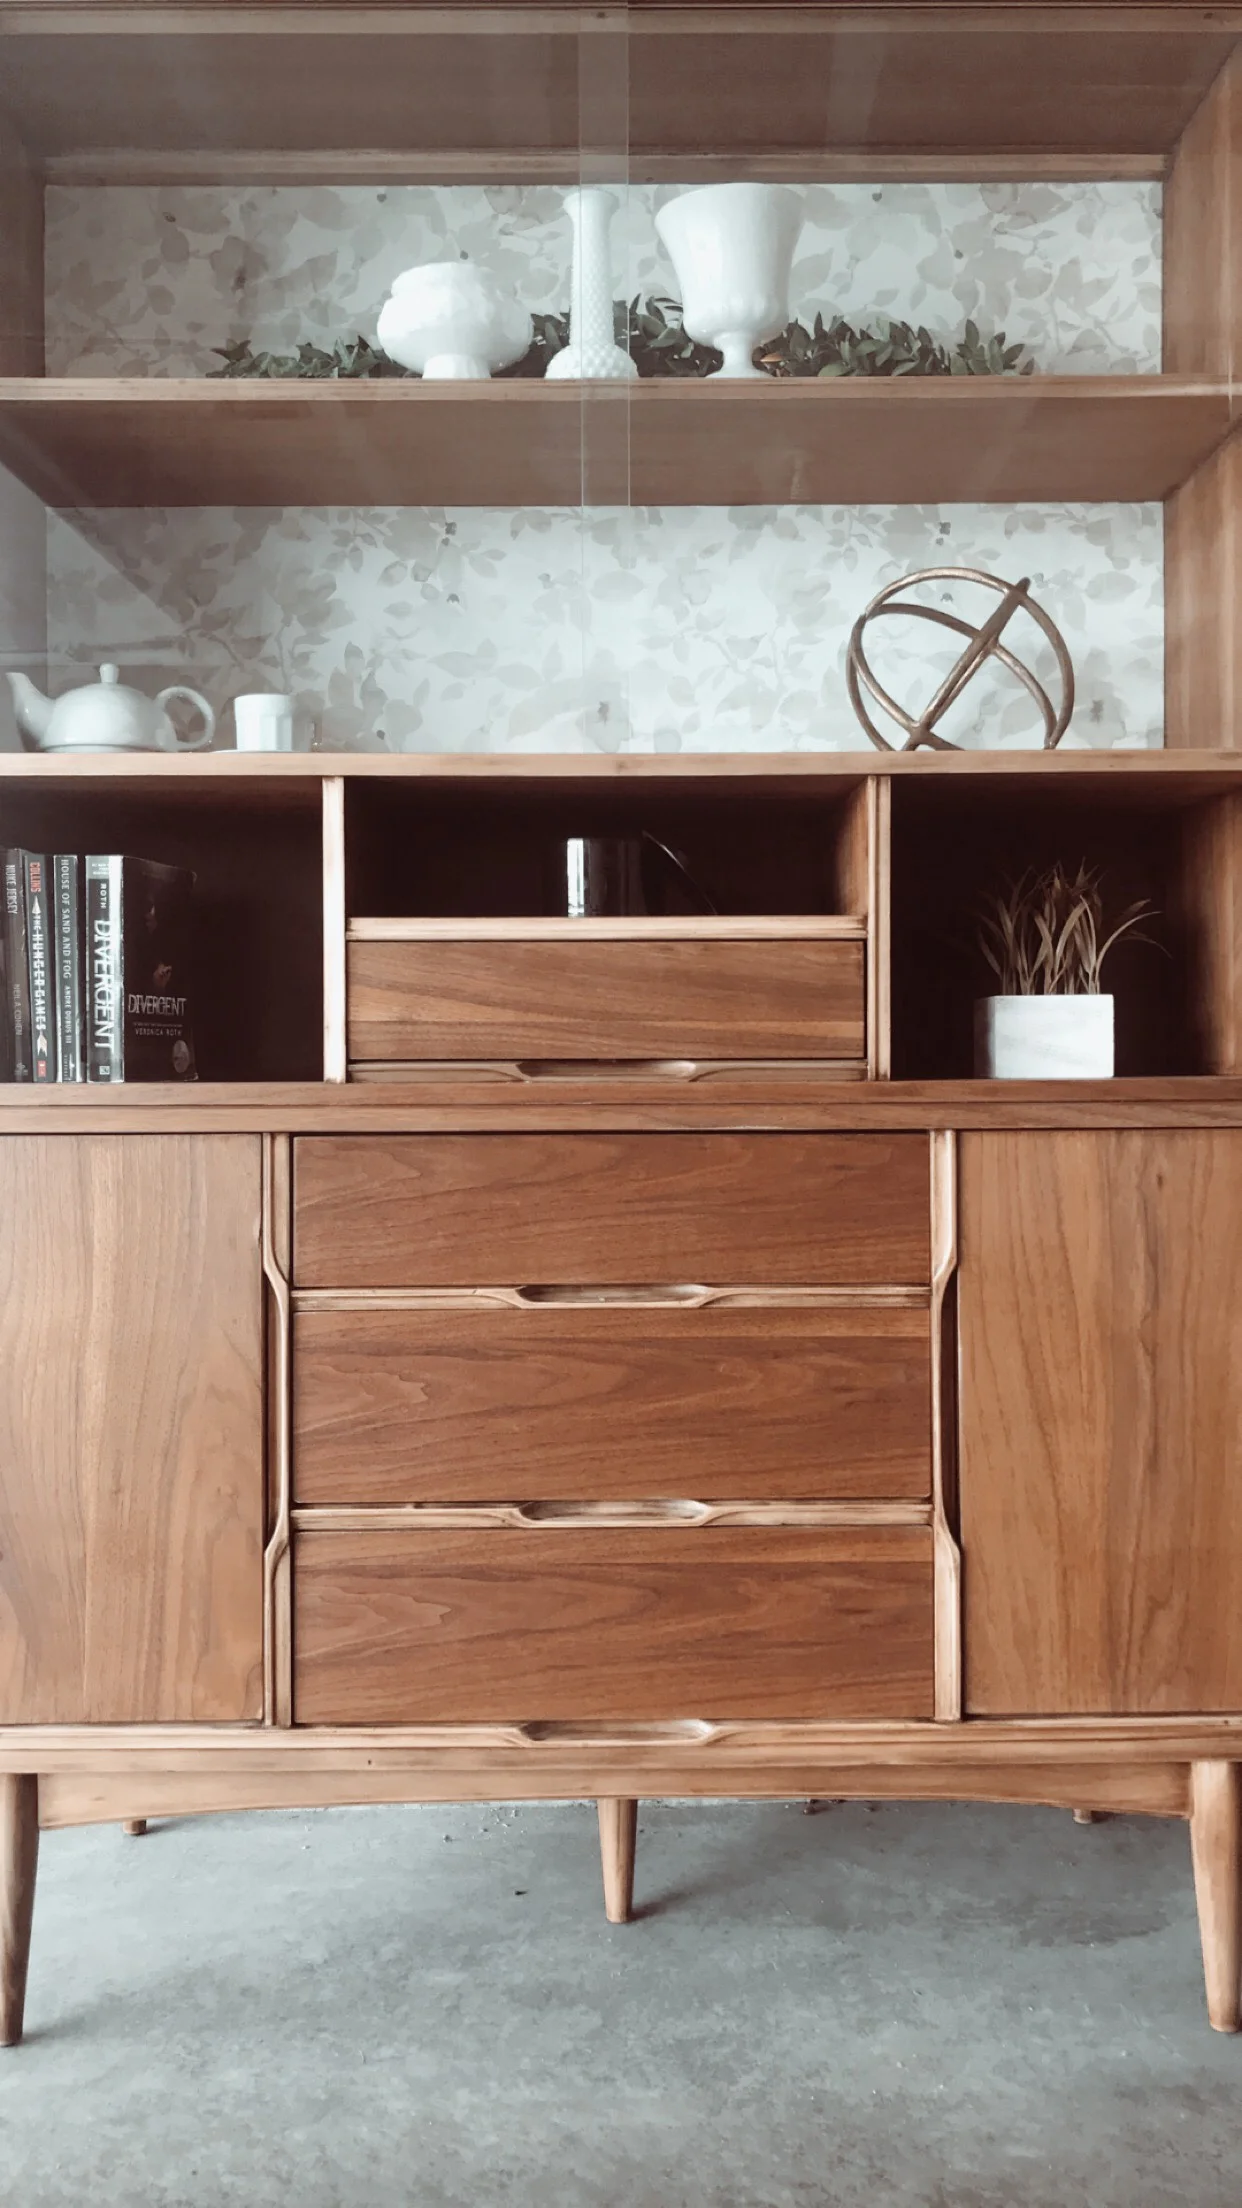
I started to think about how the hutch would look after all the love I would give it, and envisioned a wallpaper on the back of the two open shelves. I wanted to add some type of natural element and warm colors to pop the colors of the walnut. I found a stick and peel paper from Amazon (https://www.amazon.com/RoomMates-Neutral-Watercolor-Floral-Wallpaper/dp/B07J4VXNWS/ref=pd_yo_rr_rp_1/140-9664245-4025210?_encoding=UTF8&pd_rd_i=B07J4VXNWS&pd_rd_r=155cff56-62e3-47e3-a6fb-996b4c59aa4a&pd_rd_w=B4GDo&pd_rd_wg=mvRss&pf_rd_p=458b75f0-b7ae-4962-8fef-e3f0b55112fa&pf_rd_r=3EKPNMGFVDBKNTB2EPQM&psc=1&refRID=3EKPNMGFVDBKNTB2EPQM) that I thought would be perfect for the it. I am so happy I have Amazon Prime and it shipped to me in one day! Whenever I see a prime package at the door it is like Christmas morning. I ripped it open to see how beautiful the pattern was in person. I was even more in love with it in person and was ready to stick it on.
Wallpaper next to walnut wood grain.
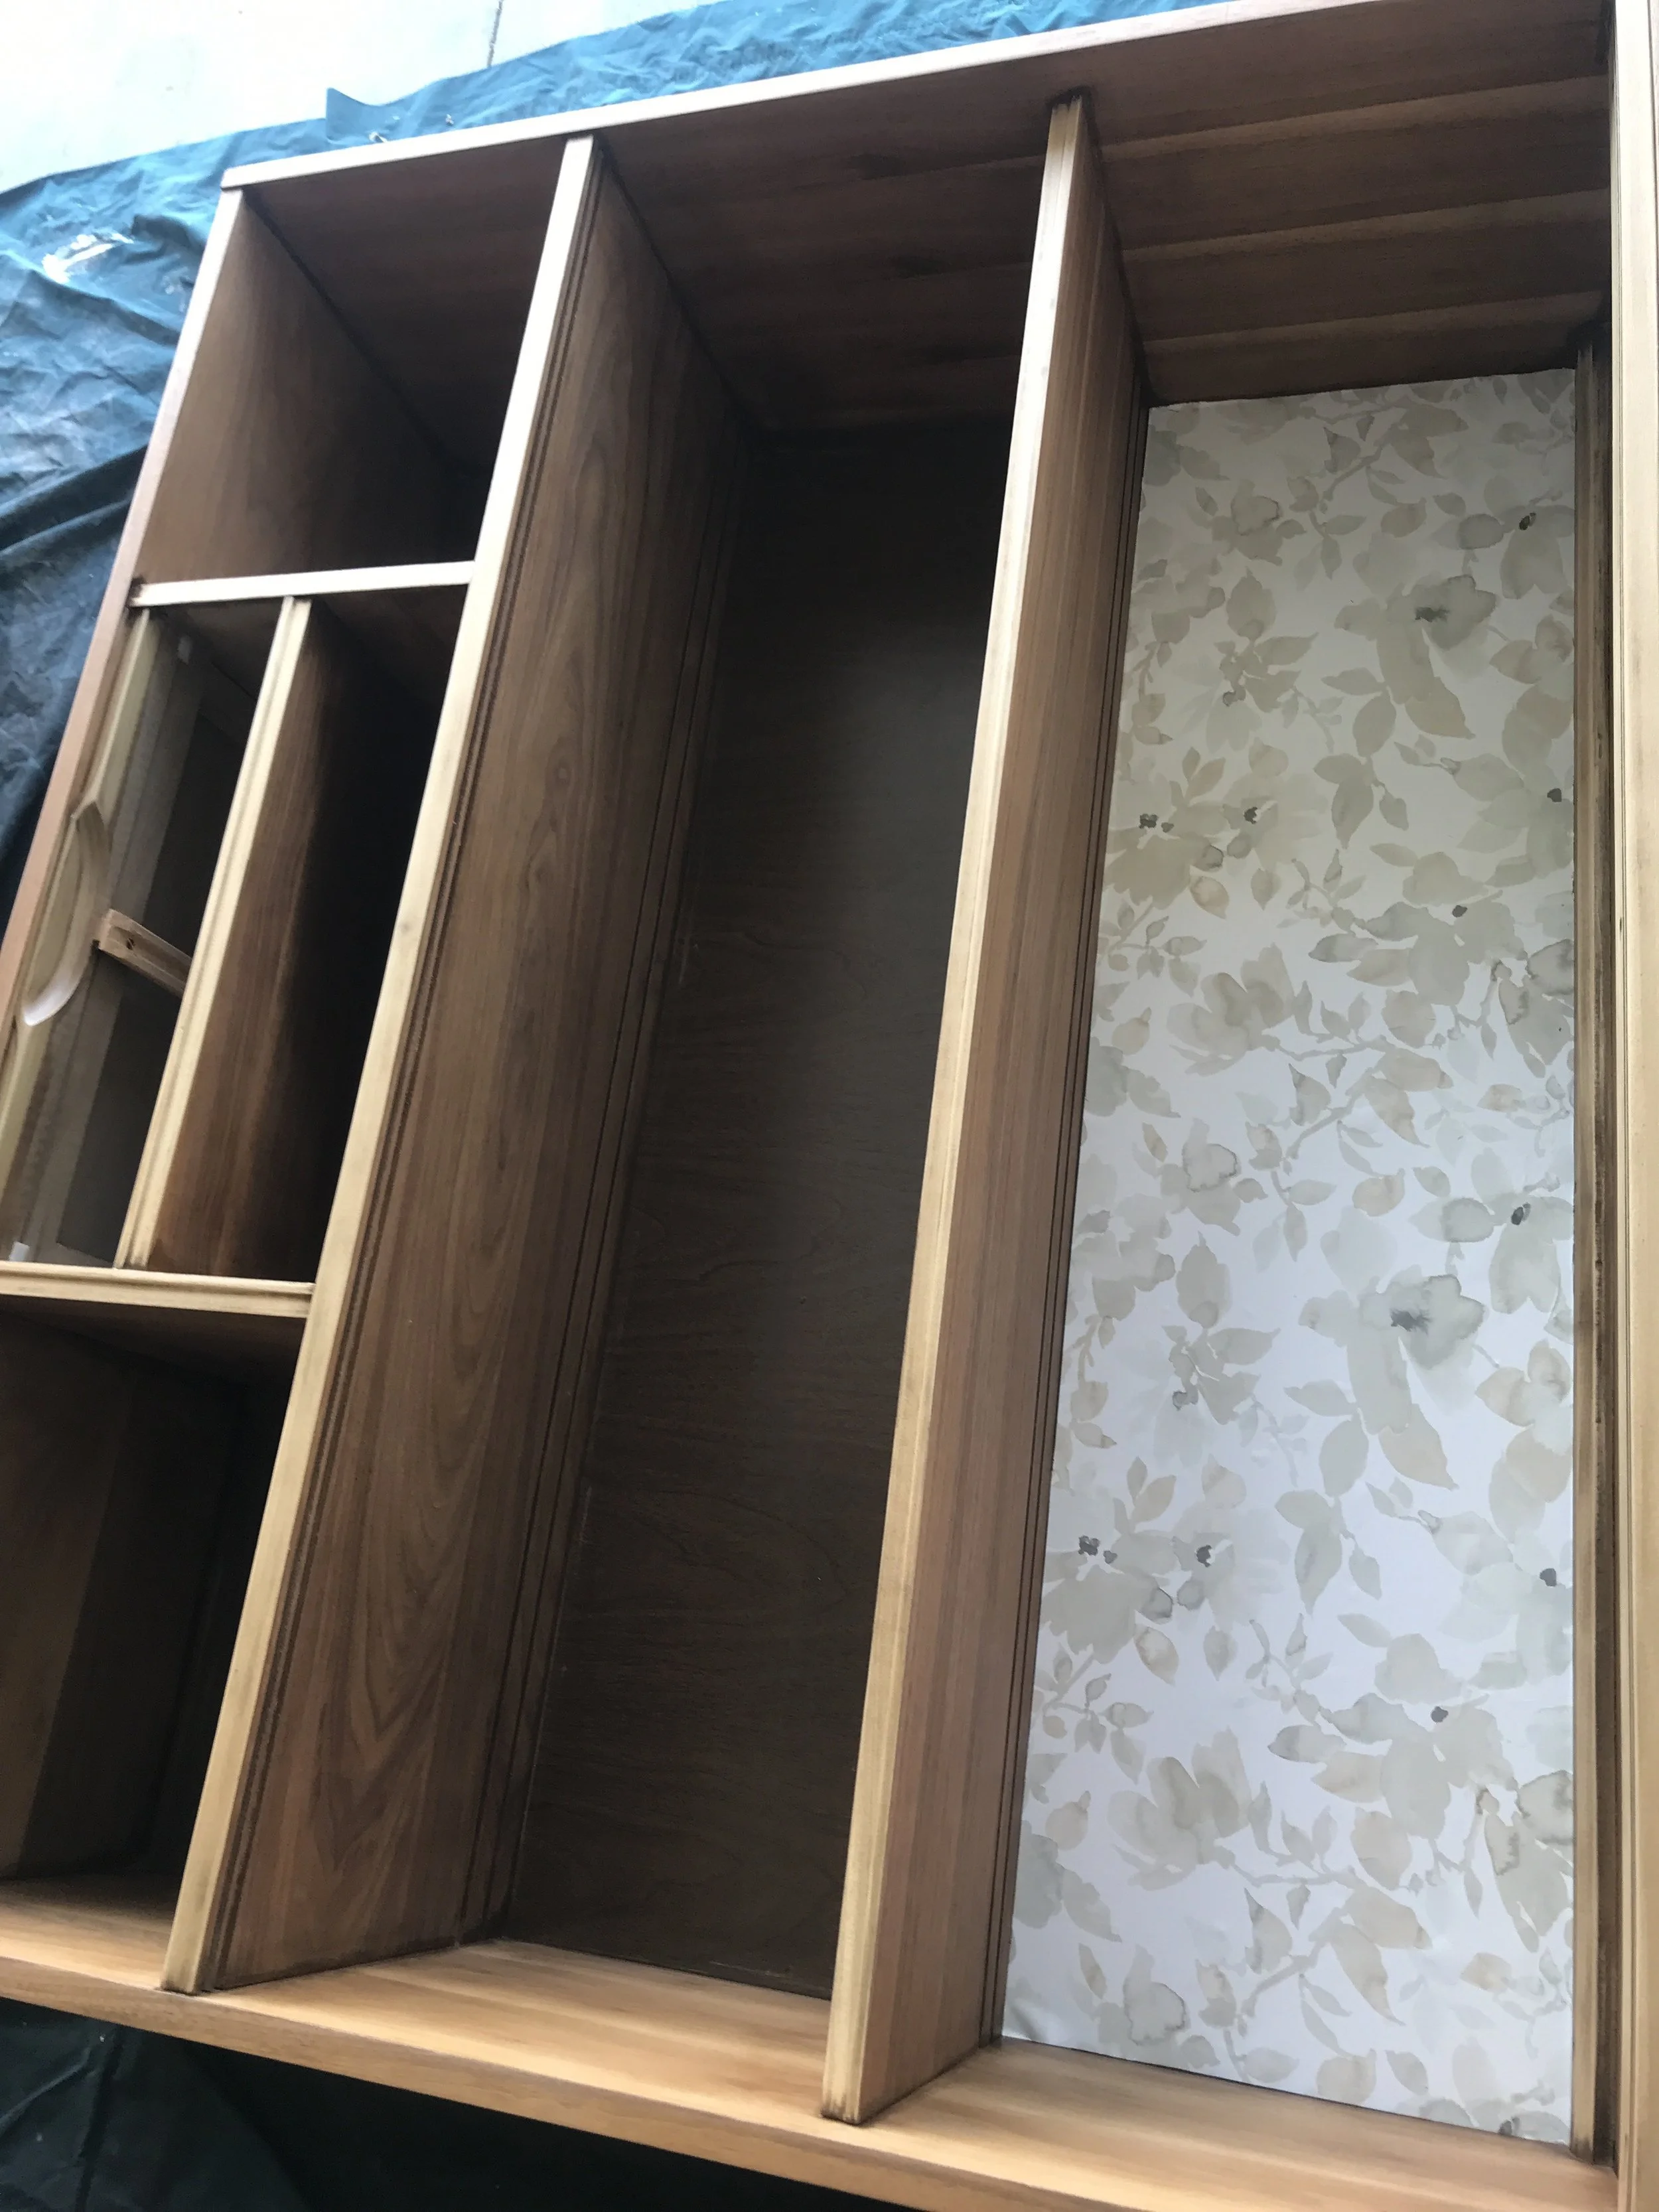
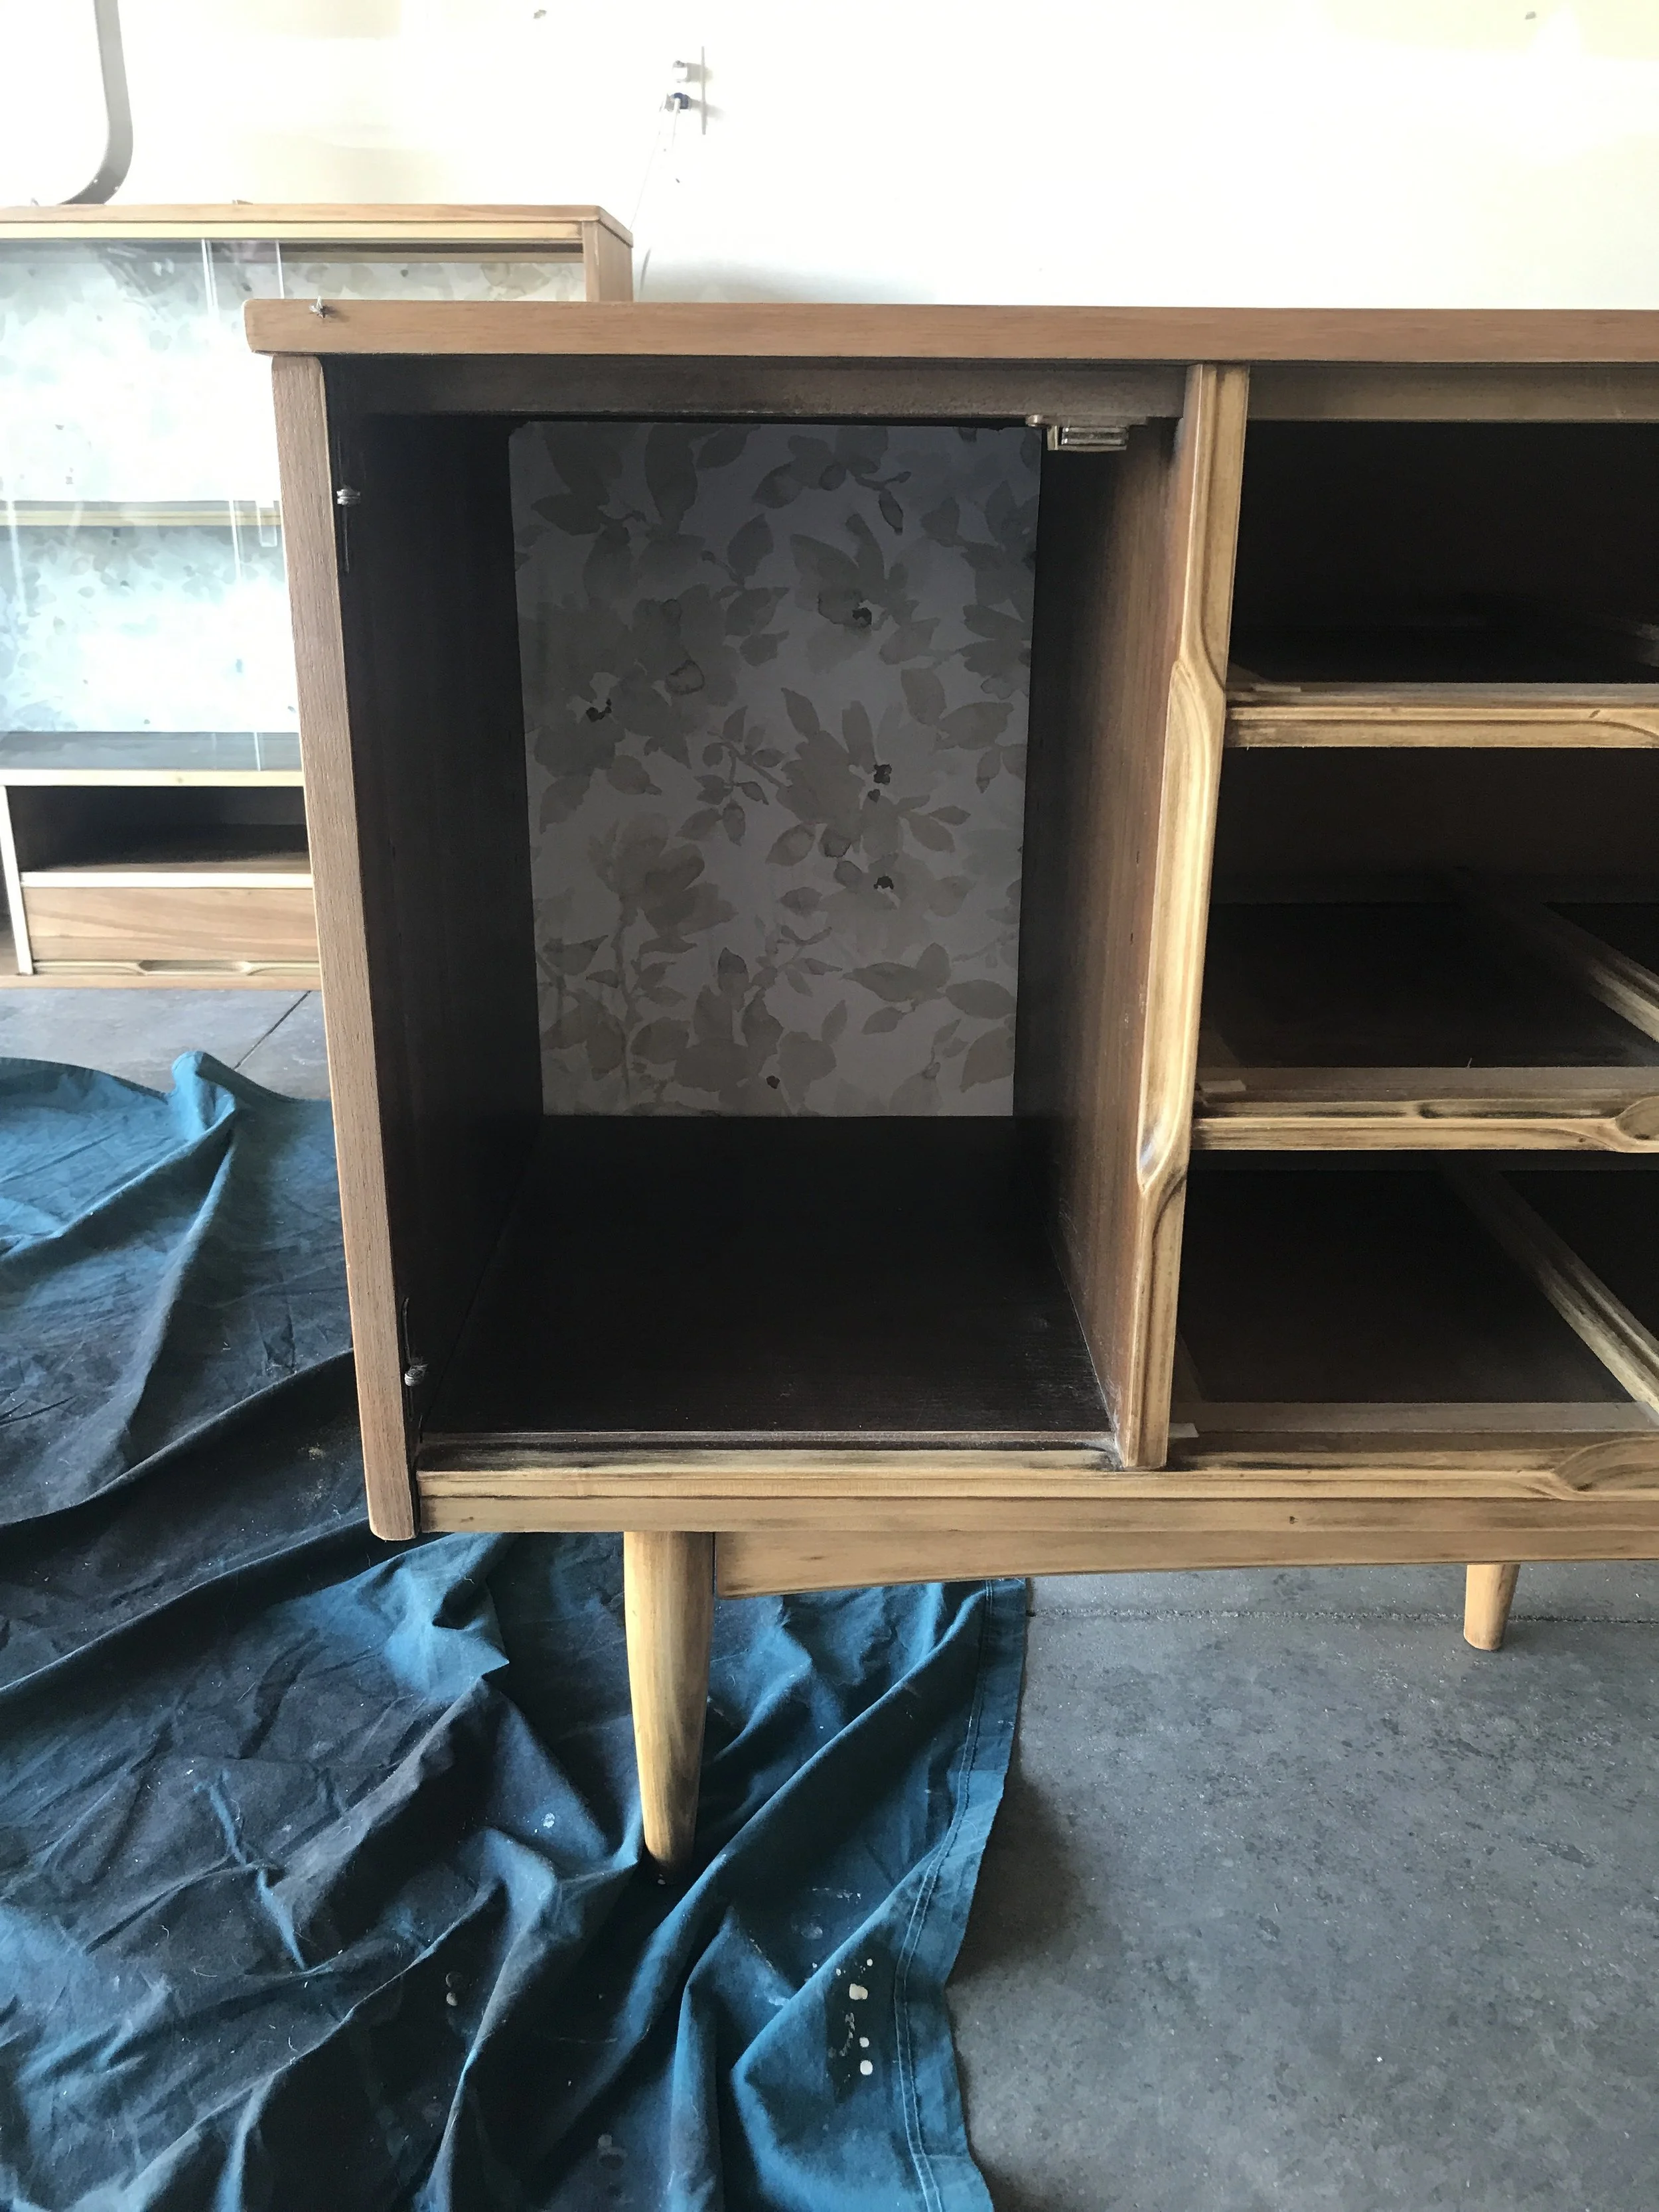
Applying the wallpaper was right up there in difficulty with sanding, and being a perfectionist did not help with this task. I started by measuring the space where the wallpaper was going to be placed, then cut the paper to that size. Once cut, trying to place it in the opening was pretty dang hard. Trying to not have any bubbles or creases was making me very uneasy. After about 30 minutes with messing with it, I decided to place the whole thing down and start in the middle to get all the air out. This worked out really well and the second went down in about 10 minutes. Since I had plenty of extra paper, I decided to place it in all the drawer bases and on the back of the shelving in the lower half.
First stick and peel paper placed on the back of the upper shelf.
Both shelves with stick and peel wallpaper placed with glass inserts.
Lower half shelving with wallpaper applied to back.
Once posted on Facebook Marketplace, it didn’t take long to for the messages to start rolling in. Many asking for dimensions, my mistake not adding that to the post… oops. After messaging many people, I finally got a taker. Ironically, it was the first person to contact me about the hutch. Even though it’s a bitter sweet goodbye, I am thankful to see it go to a new home.
Ad placed on Facebook Marketplace.
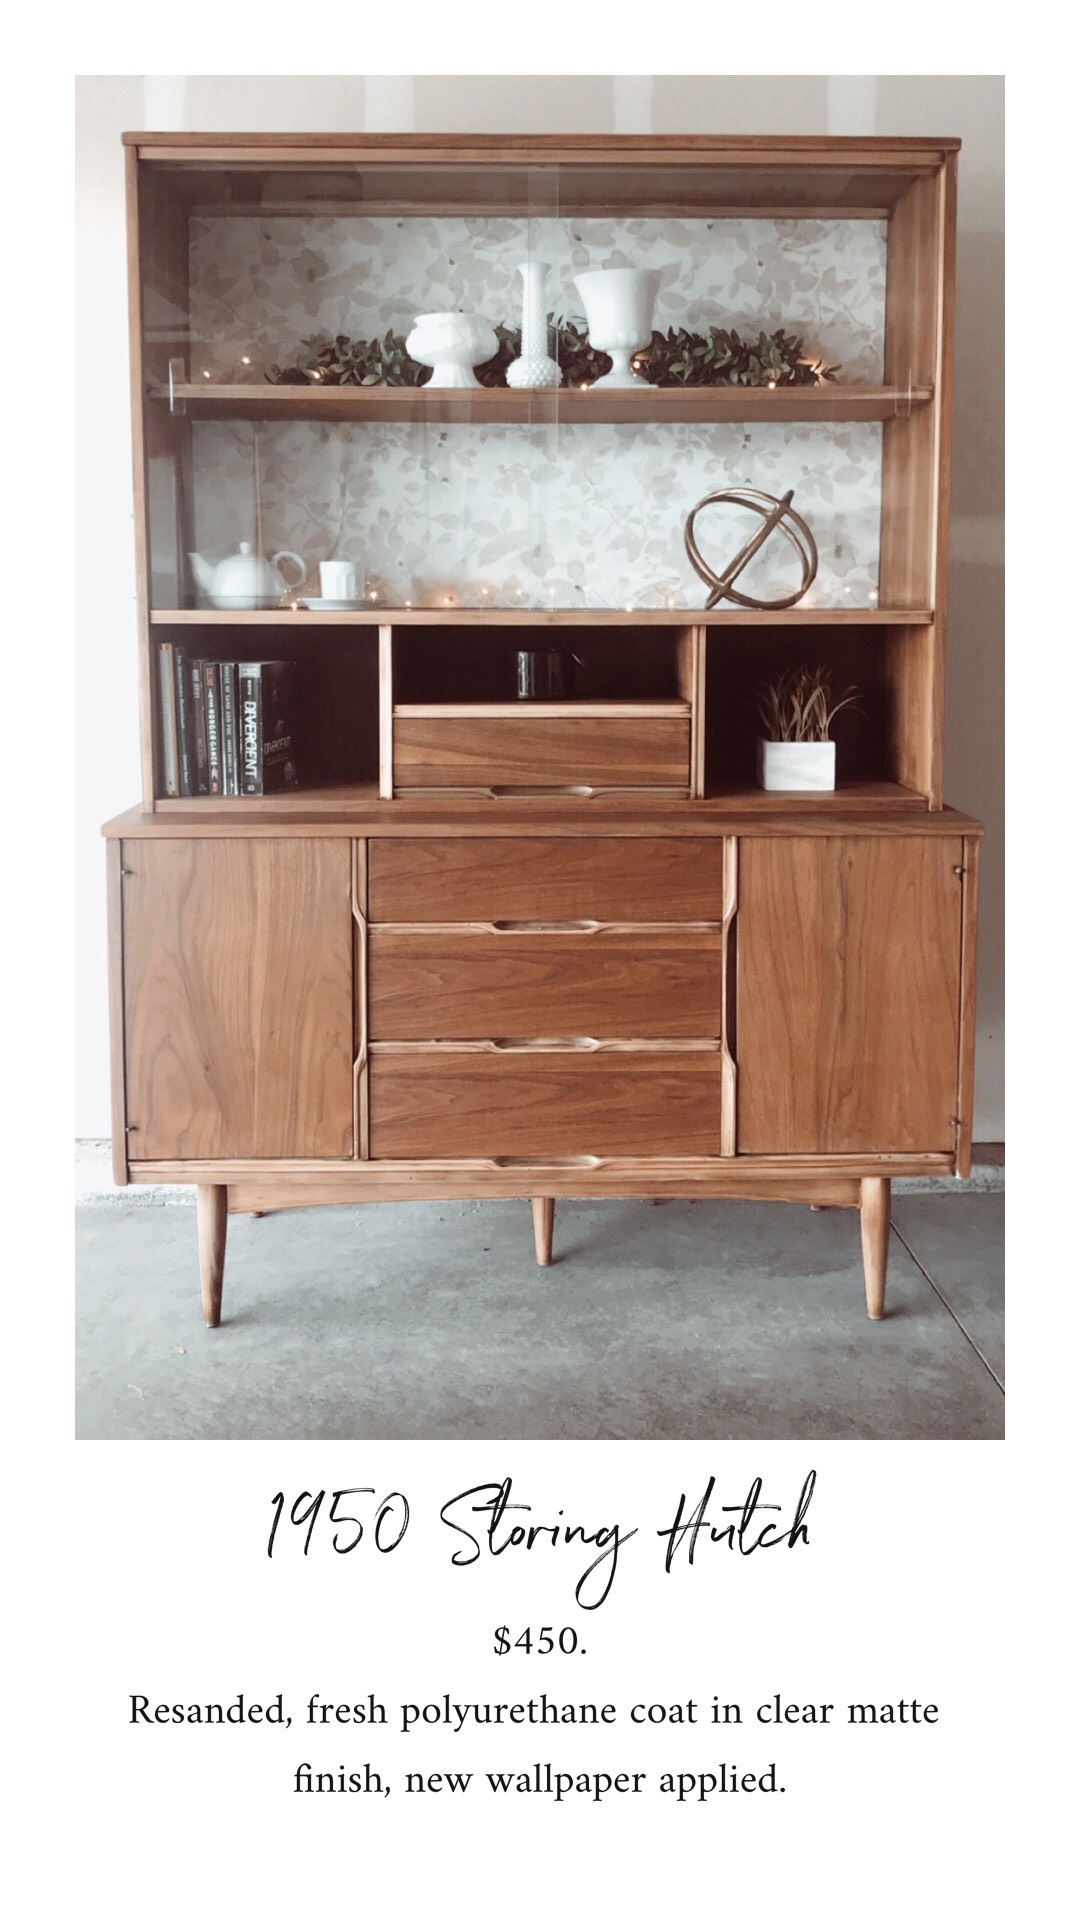
Staged after completion.
Stick and peel wallpaper placed in drawers.
There! I have finally completed my first restored furniture piece and I couldn’t have had more fun while doing so. I learned so much during the whole process and proud to say I did it all on my own. I want to thank my mom for allowing me to take up space in her garage for months to work on and complete this project, and by giving me advice from her expertise in this area of work. Couldn’t do much without this amazing woman! I am very excited to see what piece I can find next to rehab! I’m thinking maybe reupholster??

